


Mountain Biking Photography: The Berm Shot – Part III
Now that you know how to nail a sick berm shot after reading the first two parts of this series, it’s time to bring on the flash! If you haven’t read the other parts, check those out first here: Part 1 – Part 2

Adding flash into your photos can make a HUGE difference for your photography. When used well, it will separate your work from all the other photographers out there. Sure, they may have flash too, but do they really know how to use them?
To start out, you’ll only want to work with one flash. Often times, this is all the boost you need to make your photos significantly better. Flash works great in the woods where the light can be spotty, when shooting into the sun for lighting your athlete so they aren’t a silhouette, and just about any time other than when the sun is directly behind you on a bright day.
There are several important things to remember when working with flash, we’ve made a list here to make it easier to keep track of! These all apply to shooting with the flash off-camera, which will create the best lit images.
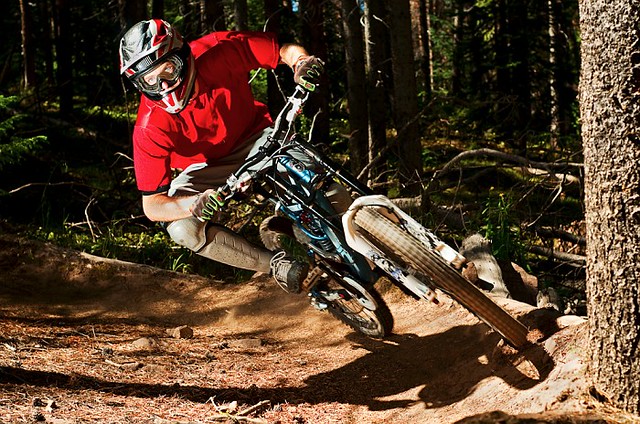
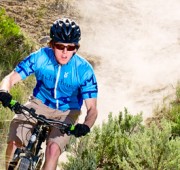
– Place the flash low enough so that the helmet doesn’t cast a shadow on your athlete’s face.
– Move the flash off to one side or another. By moving it away a bit you’ll get more three dimensional lighting.
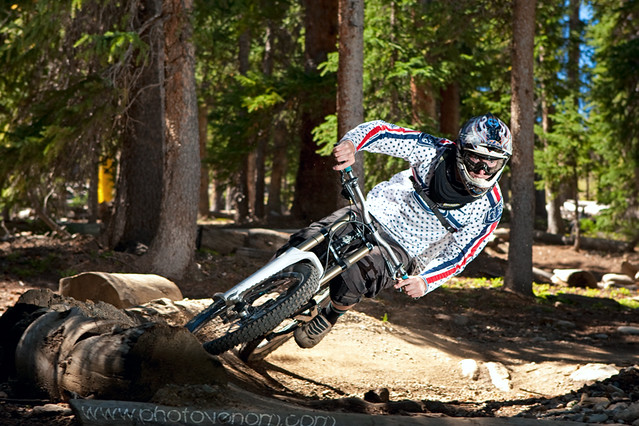
– You’ll need a lot of power from the flash when shooting into the sun since your camera will be around f/16 for a nice star. The easiest way to achieve this is by pushing your ISO higher. Just don’t go so far that noise ruins the final result.
– Generally, placing the flash on the inside of the berm makes the most sense. This is more the direction your athlete will be looking.
– Keep in mind where you place the flash and how far the athlete leans, if you place it in the wrong spot they will rip it out with their handlebars.
– Don’t overpower the scene with flash. Find a nice balance between Ambient and Flash.
– Put the flash back a bit further if possible, and zoom the head. This gives you more power, and helps keep the light isolated so the dirt doesn’t get overly exposed.
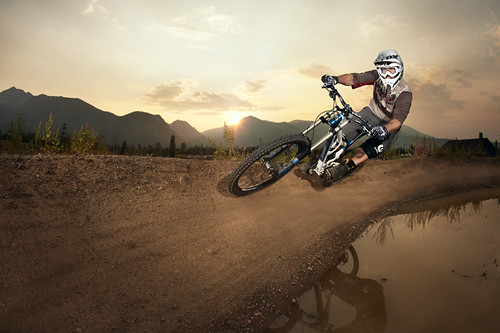
When you feel like you have one flash mastered, it’s time to try adding multiple flashes! By adding a flash behind the athlete (when it isn’t too bright out so you have enough power), you’ll get a nice rim light, and the dust from the berm will be lit up nicely. Adding a flash to the front at lower power for fill, and one off to the side will add a nice edge light. The side one should be a bit hotter to give that strong and sharp edge.
Experimentation is the name of the game when it comes to flash. Master one before moving to multiples, but keep in mind what each flash is doing when you advance. By adding one light at a time as you have the athlete pose for samples, you’ll get each one set correctly, without confusion.
Always keep in mind where the athlete will be for the shot, and set up around that. It’s better to be a little more precise than too broad and sloppy.


No comment posted yet.