


Multiply for a True Blue Sky!
A blue sky can seriously make any image better, but what can you do when it turns out a bit pale, and doesn't truly reflect how blue the sky was? Use a multiply layer to bring out the blue in post production!
There are several reasons why a sky can turn out lackluster. One of the main reasons is your angle to the sun. Certain angles will wash out the sky more than others, and although the sky looks very blue to your eye, the shot comes out less impressive. My favorite trick for adding some blue to the sky, while not messing with other colors in the shot, is to use a multiply layer and blend it with the image. This will also add a lot of definition to the clouds and make your sky more dramatic. Like all editing techniques, this one works best with finesse. So even though you'll be tempted to overdo the effect, take it easy trigger finger….
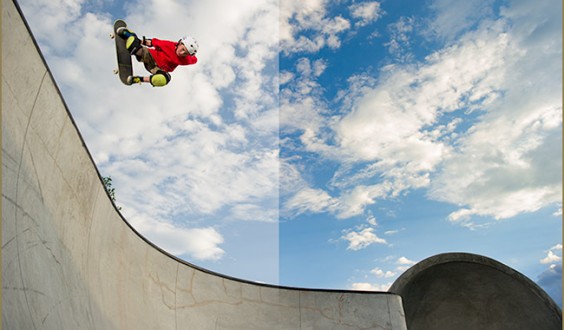
Before/After
Here's the process:
- Create a new layer by pressing CMD+J on a Mac, or CTRL+J on a PC.
-
Make sure your new layer is selected, then change the mode to Multiply using the dropdown menu.

- You'll notice how dark the image looks, don't worry, it's not done yet! While holding the Alt/Option key, click on the "Create Layer Mask" button at the bottom of the layers panel. This will hide the multiply layer you just created.
- Choose a large, soft brush. Then make sure the foreground color you have selected is white. Paint the sky with the brush and you will "unmask" the area you paint to reveal a darker sky. Don't worry that it's too dark at this point.
- If you mess up with the brush, you can always change the foreground color to black and paint over the mistakes, but it doesn't need to be perfect, just close. Paint the sky and clouds and nothing else.
-
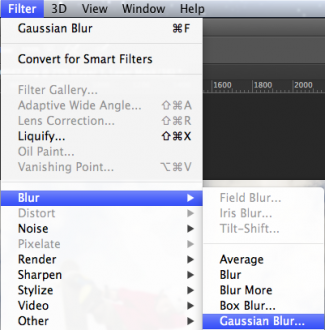
With the layer still selected, go to "Filter>Blur>Gaussian Blur"
- Choose a fairly large radius 100-250px and watch the effect it causes. This will smooth out the brush strokes more and help ease the blending so that the layer is not quite as noticeable but still has a strong effect.
- Now adjust the layer's opacity down to where the image looks natural, and you're done!

Category: ProcessTags: blue sky, bluer sky, create a blue sky, layer, multiply, multiply layer, photoshop


No comment posted yet.