

It’s that time of the year again…. Time to go through more photos than you had realized were captured, and narrow down to the best ones for submissions/editing. Anytime a submission calls for JPEG’s, I like to go through and do quick edits on every image. This is a task that can be extremely daunting, but with lightroom has become a quick and easy process.
After having spent so much time in the last year needing quick image turn-arounds, I’ve developed a quick go-to editing method that makes for awesome looking images. This method works best for skiing photos, but can be easily adjusted and used for almost any type of image you’ve captured. These are the adjustments I make when I’m turning around an image quickly for a client and want it to look it’s best in a very short time.
For this tutorial you’ll want the latest version of Adobe Lightroom. Version 4 or above will have all of the required adjustments.
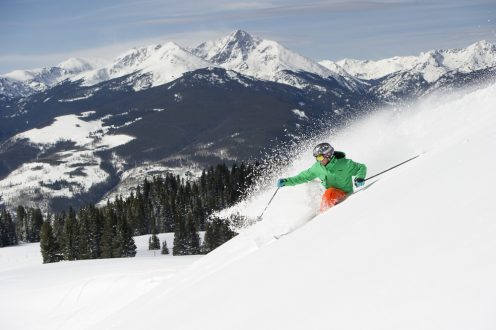
- Correct image exposure if needed with the exposure slider. It’s always best to start at the top and work your way down!
- Slide highlights exposure a bit to the right to whiten the snow. If the image is from a very gray day, go left with highlights to bring back some details.
- Slide Shadows exposure to right to open up the shadows and bring back details.
- Slide Whites exposure to the right to truly whiten the snow. Snowy images will almost always come out under-exposed a bit, even when shot with a good amount of over-exposure. Whiter snow looks more natural!
- Slide the Blacks exposure to the left. This will darken all the darkest parts of the image, and bring back contrast that was lost when the shadows were opened up.
- Boost clarity and vibrance a small amount to add more detail to the snow and pop the athlete’s jacket.

These quick adjustments really seem to work for almost any ski/board image. They make the snow nice and white, retain contrast, but also add detail to the image. Like all adjustments, less is more. If you even think you might be overdoing an adjustment, drop it back down a bit. This method is super quick and simple and makes workflow a hundred times faster. Often times I will adjust images this way and not even feel a need to go into photoshop unless the image needs some localized sharpening.


