


Getting the Best Shots from Your Kicker Day
How to get the best shots from your Kicker day
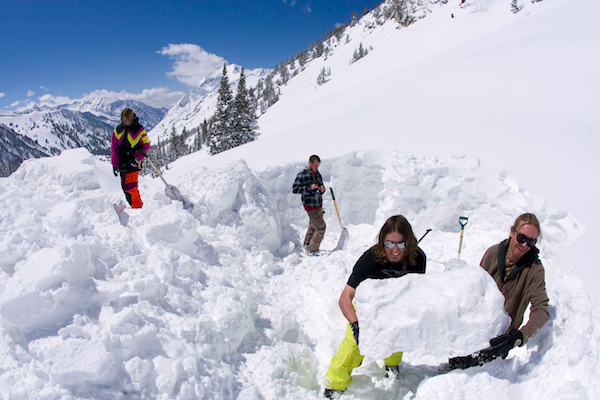
The snow has just fallen on the mountains, dusting the hills with pristine white powder and as any good snowboarder knows, it is best to hit the kicker within a few days after it's fallen. It is time to pack up your gear and tools to head up for some breathtaking vista, and heart pounding jumps. Grab your best hardworking mates (not the ones that sit around and wait until you've finished) to help you build a kicker that will give you hours of fun and delight. A good rule to set right at the start is if you don't help build it you can't hit it!

Point of Reference
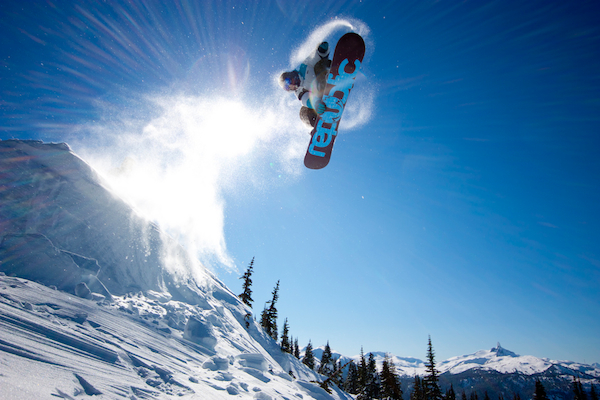
The point of this, after all the building is done, is to spend the day throwing yourself off the kicker and getting pictures of you and your mates looking like pros. This is the fun part, set up your day of boarding, jumping, and filming. You need to set up your camera so that you get great, clear, action shots. The first rule of a action photography which I learned whilst working with Sketch Book Films photographing and filming people on their ski holidays in France, is that the point of reference defines your shot. The shots needs to establish where the snowboarder both came from and is going. Therefore the shot needs more than blue sky. Include the hill the rider is coming down, the kicker (if possible), and the ground below as your buddy soars through the air.
Composition
This is all about the positioning of your subject in the frame. A shot with the jumper in the dead center of the picture will look flat and most of the time will not work. Most photographers follow the rule of thirds. Google this; it will help you set up your compositions but also remember, rules are meant to be broken. You are the one with control over your photos. Consider what looks interesting, change you angles, check depths, lighting, and shadows. If it isn’t working, then change your position.
Lenses and Appearances
When shooting action from your kicker you want to make your trick look big and bold. Like Shaun White is performing it on international television for all to see. On film a trick looks bigger when you manipulate the angles of the shot and the lenses used when working with the rider, location, lighting, and final picture. The different lenses change the height, angle and drama of the shot. A fisheye lens can visually increase height while a telephoto lens changes the visual distance of shots. Professionals suggest if you can only afford one lens that the performer for snowboarding is the 70-200 f2.8. This model is made by a variety of companies and should be added to your bag of tricks to start your photographic endeavors.
Depth of Field
This concept is hard to explain but important. Say you are in an area with dense trees and a messy scene for the background. In this case you want a shallow depth of field. This will make the rider stand out and pop in the picture. The further field (background) will blur, and the shallow field or area of focus (the rider) will be sharp, clear, and bold. Other times, you want the background to be clear and sharp while the surrounding areas are blurred or less clear. Playing with depth of field, means adjusting the f-stop; Experiment with your options and see what makes your subject look the best. A shallow depth of field will be a lower number, like f/2.8 and will have more blur.
Film & Shutter Speed
The speed of the film and shutter determine the amount of light you allow in, and the ability to catch a fast moving scene. The recommendation is 1/1000 second and f5.6 with a film speed of 100 ISO. This will set the film for the right measure of light in various settings. Again rules are meant to be broken, so work with your lighting and the angles on the rider. To light the rider, pay attention to the time of day when you are shooting. Lighting in the bright part of the day will be different than the ambient lightening of dawn or dusk. Keep in mind that on-camera flashes rarely work in snowboard photography, therefore you might considered the use of flashes and radio slaves to adjust lightening when needed.
Keep the Camera Warm
You don’t want your equipment freezing up on you. The warmth of the camera is important to the functioning and battery stability. Cold batteries drain faster and increase static charges. Sliding the camera inside your jacket will reduce the impact of the cold on the camera and increase the success of your photo session. If you are shooting in really cold weather for long periods try attaching hand warmers around where the battery is on the camera.
The Rider
You wouldn’t think that what your rider wears would make that much of a difference but it does. If you are in a outdoor forested and snowy setting you might not want camouflage or all white. You would lose your subject in the photography. The same is true for a rider dressed in all black during night sessions. Keep this in mind when you are planning your trip. Make sure your mates dress for the setting. Bright colors can make a huge difference!
No comment posted yet.