

I would refer to this image as a “typical” skate shot. The usage of multiple flashes, color gels and cool locations is often done in skating. Combine those three with a good skateboarder and you have a recipe for a great skate shot.
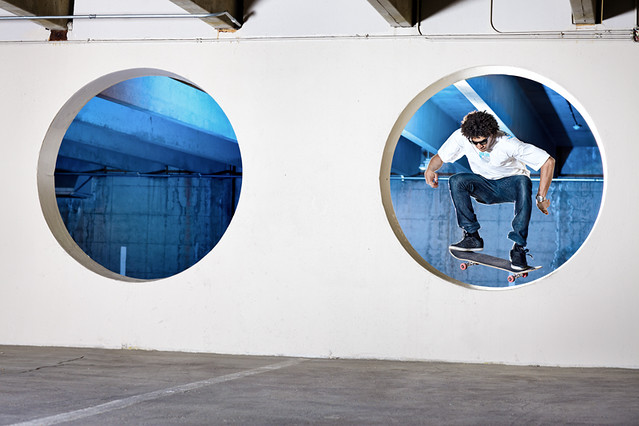
Start with the location first. This is a local parking structure that I have been in and out of thousands of times. Then one day I realized it will make for a good shot. Look around and make notes of the spots you pass by every day. You will probably come up with a cool spot out of nowhere. After trying a few different compositions, I thought this is the one I liked best.
Off to the lighting, for this shot I used three flashes. Two AB1600’s were placed behind the wall and right in the middle between the two circles so the camera couldn’t see them. One of the lights had a blue gel on it and was pointed straight back and upwards. This way it threw light on both the ceiling and the wall. The other one had a 8.5inch high output reflector and was pointed at Andrew(the athlete). The rim light needed to be more powerful than the blue flash to truly create a nice rim. Doing this also stopped the blue light from spilling on Andrew. The reason why I didn’t have the light further back to completely avoid spill is because I wanter the ceiling above him to be blue too.
On the front I had an AB800, because of it’s shorter flash duration. I knew this would give me a sharper result. To get nice and even light I used a 48” Octa-box, but a medium softbox would have worked just fine. I had it backed up and to the left of me. That extra diffusion made me turn the AB800 all the way to full power, just so I can balance it with the two 1600s in the back. This all worked out really well because with alienbees, the higher the output, the shorter the flash duration.
Andrew gave it several tries before he started landing his trick every time. This let me try a different approach and capture the same shot with Mamiya RZ67 Pro II with a polaroid back.

Follow the recipe and go get a shot for yourself!


