


Nailing Focus
When you were a kid sitting at your desk, ignoring the teacher, and talking to your best friend, what did the teacher look at you and say? FOCUS!! It was important then and it’s probably even more important now that you’re into photography.
No one likes images that are supposed to be sharp but are blurry or just slightly out of focus. Believe us, it sucks when you blow focus on an otherwise incredible image… There’s very little you can do in photoshop to fix it and it’s never good enough. This is a quick tutorial for beginners with techniques for nailing your focus.
The key to sharp focus is planning the shot in advance, and keeping the right focus settings in your camera (an extremely sharp lens won’t hurt as well….) So right here, right now, and at the bottom half of this article, we are going to reveal to you the confidential secret settings in your camera that will make your focus 10x better, just please don’t tell anyone else.
When it comes to shooting action there are several approaches that when practiced will help yield consistently sharp images. These approaches are all based on what you are shooting.
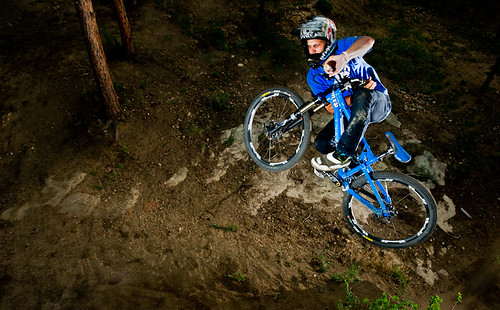
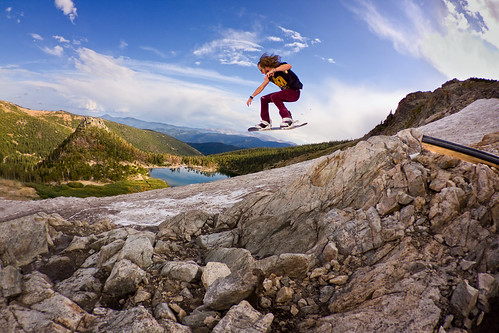
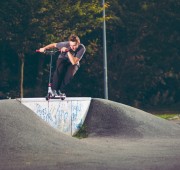
If you know where the key shot will be in the athletes line or path, then pre-focus on a rock or something at that key point. Either lock-on using Back-Button AF (Explained here, and yes your going to want to switch to this method!), or set your focus with AF-S and switch the camera to manual to lock it in. Or you can always do it the old way and manually set the lens! Pre-focusing works well if the key shots are perpendicular to you since the athlete will generally be the same distance away. This works best for jumps, berms, and staged shots.
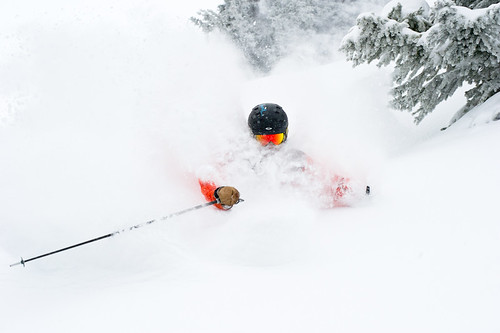
The other method is using continuous focus. Use this when the athletes are flying head-on or there are lots of athletes such as basketball, hockey, or football. Basically anytime when you aren’t sure where the key shot will be. Pre-focus won’t work if the athlete is moving around too much and at different distances from you!
Below are the Nikon, and then the Canon settings for making your continuous focus work quickly to keep up with the action.
Note: Different camera models will have different settings and may not have some or all of these options. Look in your camera manual to see which settings your model has!
For Nikon users, these settings will increase your continuous focus speed: (Setting A3 is most important!) :
A1: This is your continuous auto-focus priority setting. There are generally three modes here. Focus, which makes sure the camera has perfect focus before it will even fire a shot. Release which will fire regardless of how good the focus is, and Release+focus which gets the best of both for faster speed but focused images. Set this one to Release+Focus, or release depending on how much speed you need in your sequence.
A2: Same as A1 but for single images. Leave this on Focus.
A3: Dynamic AF area: Dynamic AF area is based on a selection on your focus dial, if this selection is set (which it should be) set this to a lower point value to gain faster focus. Dynamic AF is when your camera will cover a larger area of focus points just in case your subject drops off the point you have focused. Make sure to choose this mode with the dial on your camera body.
A4: Focus tracking with Lock-On: This controls how long your camera maintains it’s focus. If you are shooting a fast moving sport where athletes will pass each-other than set this to the longer settings. This way if something passes in front of the athlete, it won’t jump to focus on the subject in front causing you to miss the shot. For individual sports you can leave it slower and it may work a bit better.
A5: AF activation: This is where you can separate your focus from the shutter button. I find this works much better to use the back-button (AF-on) for my focus rather than pushing the shutter halfway down. It’s faster and you don’t have to change the AF dial from continuous mode, while still retaining the ability for manual, continuous, and single AF. Just hold for continuous, tap once for single, and spin the lens for manual. Change this to AF-ON only to start using the back-button rather than the shutter button.
A8: AF Point Selection: This one is based on your personal preference, I personally like to have a lot of points to select from to fine-tune my images.
If you like to find out more about Canon’s settings check out this article!
Next Guide Article: Basics of Composition


on
Hi guys,
First of all, let me congrat you about the great site, there is a lot of useful info!
I have a question about settings A3. How does the Dynamic AF compare to the Group Dynamic AF. Both settings are present on my D200, so which one would you recommend to use to nail that tack sharp photo?
on
Darn that you are Nikon guys! I would love a cheat sheet on good action focus tips for Canon. The link wasn’t as concise as yours! Can you translate into Canon….please! I just got a 70-200 2.8. and am having frustration with focusing and missing those once in a lifetime shots! HELP
on
Love, love, love this! I would love even MORE!!