Find the Best Angle
With any photo (especially action), the angle will determine how good the final shot is. Locations that are only a few feet apart can be completely different, with one rendering a total throwaway, while the other makes for the best image you’ve ever shot! So how do you find the best angle?
There are several different approaches to finding the best angle for a shot. If you have plenty of time for setup, walk all around the location and take a quick snapshot from each view. Reference these after you’re sure that you’ve covered all areas, and try to visualize where the athlete will be, and in what body position from each angle. From there it should be easy to determine what will look the best. If your lucky enough to get to shoot the same spot multiple times, try a few of the best angles and one of them will surely work out.
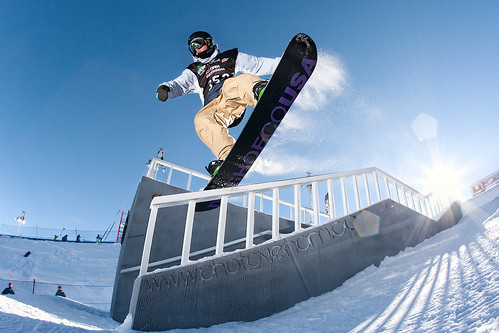
Try to think differently when looking for angles. Shoot wide or zoomed and avoid using standard length lenses. This way you are creating shots that are different than what the eye normally sees, which is visually appealing. The best angles are often in the most awkward places. Under the jump, through the trees, up in a tree, fisheye from behind, the options are endless. This is the secret most photographers just don’t seem to get. A correct exposure from a plain angle will yield a plain image. Take the same exposure from an extreme angle and you’re getting something far more exciting!
When limited on time take a quick overlook of the area and try to picture the angles in your head and what lens will work from each one. This evaluation process should only take a few seconds. Once you’ve done this a few times it will become easier to find the best angles quickly and smoothly.
If you are really in a tight push for time (shot of a lifetime flying at you), keep a zoom lens on the camera and go for the stock head-on images. This at least insures that you capture an image. It’s better to get an image than to go home empty handed.
The best angle almost always tells the viewer a story. It includes features that show what’s going on. When most photographers start shooting action, they tend to leave these details out and will capture shots known as “Guy in the Sky.” It may seem very cool at first to get an athlete in mid-flight with sky around them, but the shot is not very exciting for anyone else to look at. Show the features that explain the sport. If it’s a biker in the air, show the take-off or landing in the photo as well. Kayaker on a waterfall? Don’t zoom in so far that you can’t truly see it’s a waterfall. Show the rocks around it! By now I’m sure you get the point, but take this point seriously as it’s a HUGE deal!
There is no set angle that will work for every shot. The best angles take time to find, tell a story, and are dramatic. Take those three tips to heart and you will consistently capture great images.
Next Guide Article: How to Find Athletes to Shoot With


Pingback: Exposure Compensation eXplained - by Action Photo School